Showing posts with label gk 734a. Show all posts

Wednesday, September 4, 2013

31 Day Challenge - Day 3: Yellow


I love yellow and I also think this color looks pretty nice againt my skintone but I absolutely hate the staining that comes with it so I desided to cheat a little bit :)
I am wearing 3-4 coats of Essie Waltz and the yellow glitter is from Glitter Bunny I Got A Goodie Bag. on my ring finger and my thumv I have a reverse glittergradient with the holo glitter GK734A.

This design is going to stay on me for the holiday (jewish new year) and I won't be here for a while. I'll have to make up for missing so many days of the challenge somehow...

אני אוהבת צהוב ואני גם חושבת שזה צבע שנראה די טוב עם גוון העור שלי, אבל אני שונאת את ההכתמה שהוא משאיר על הציפורניים אז החלטתי לרמות קצת באתגר היומי:)
אני עם 3-4 שכבות של  Essie Waltz והגליטר הצהוב הוא מGlitter Bunny I Got A Goodie Bag. על הקמיצה והאגודל עשיתי גרדיאנט הפוך עם הגליטר ההולוגרפי  GK734A.

העיצוב הזה הולך להישאר עליי במשך החג ואני גם לא אהיה פה כה ימים. אני אצטרך למצוא דרך יצירתית לפצות על כל הימים שפספסתי באתגר...

חג שמח!


Thursday, August 22, 2013

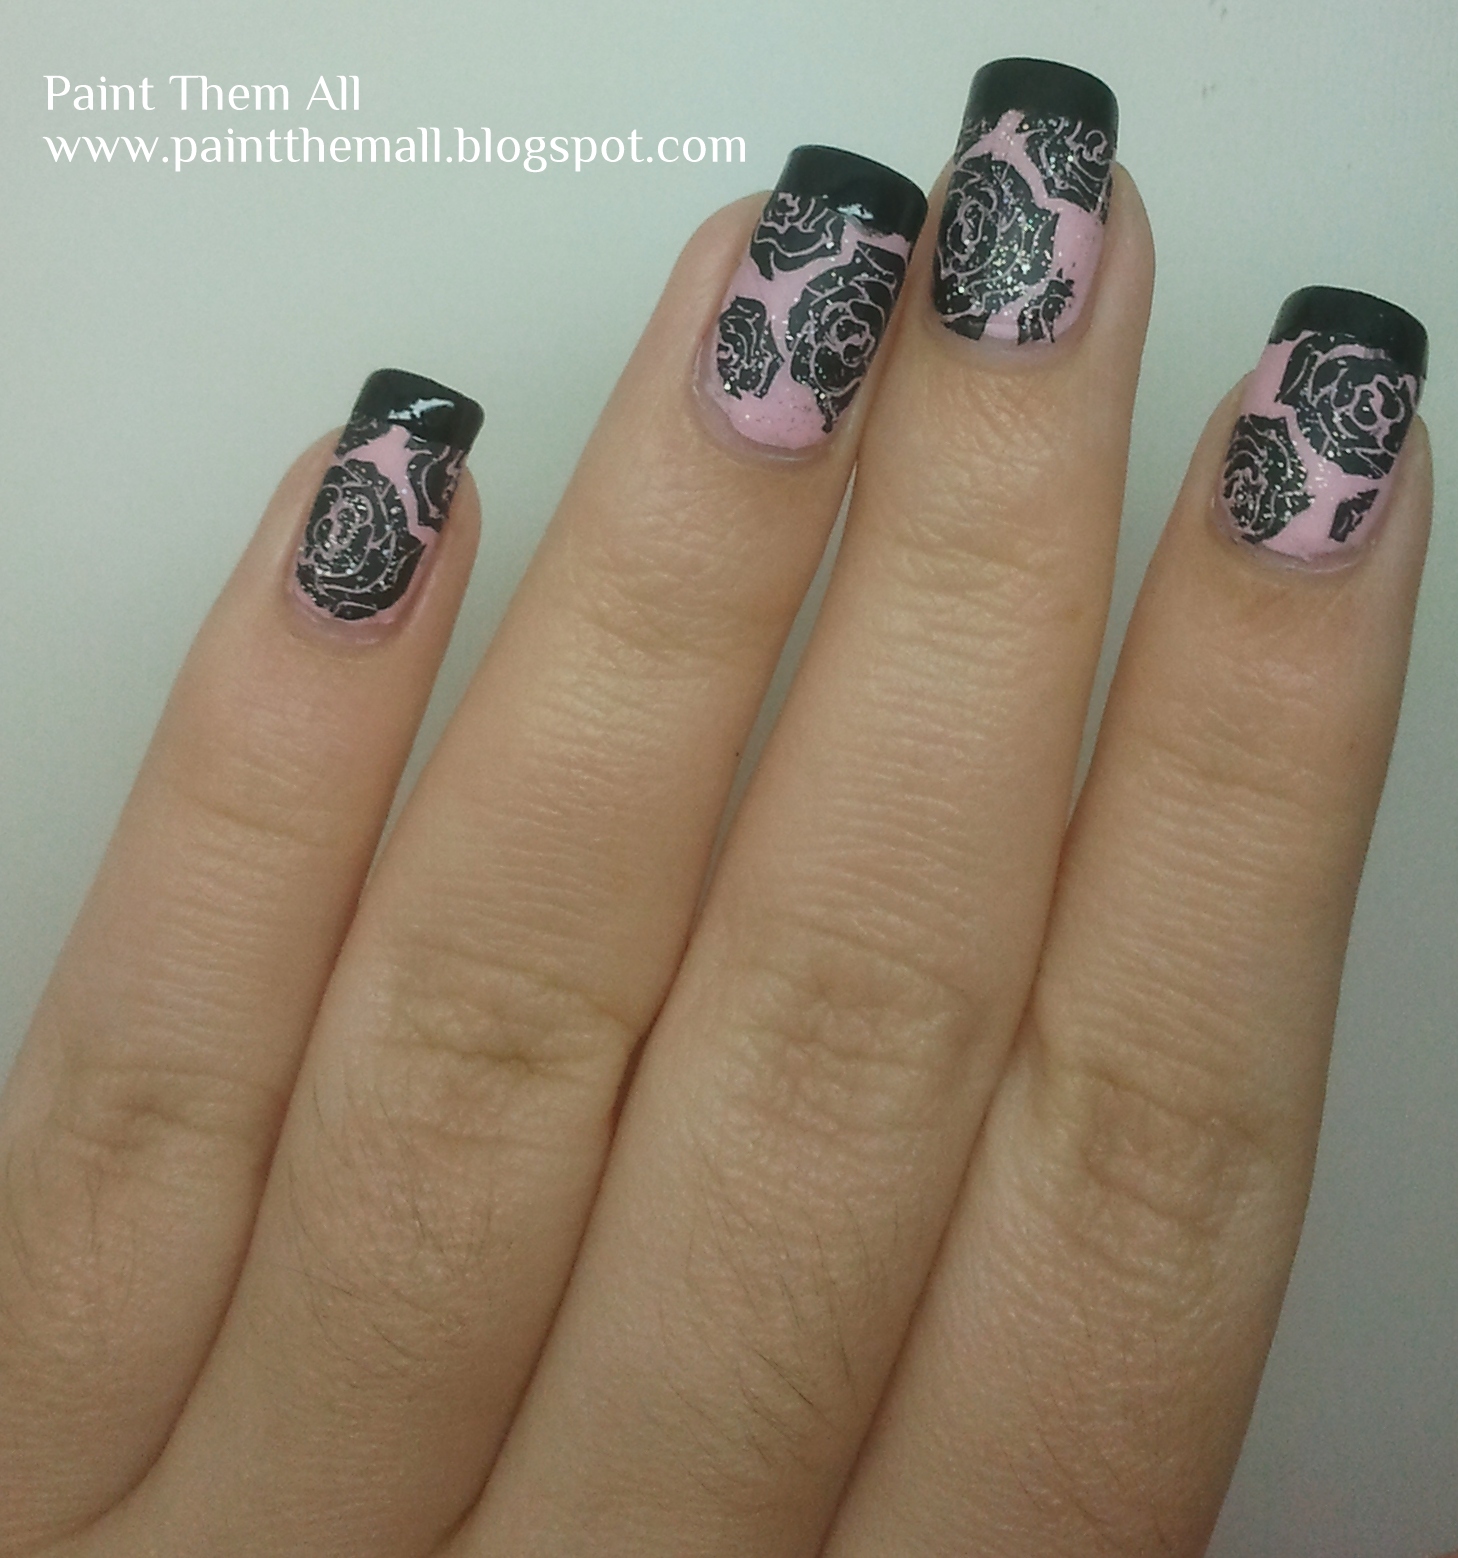
Stamping with WOW 393

הייתי עם המניקור הזה במשך 5 ימים ברצף! זמן שיא בשבילי, במיוחד כשאני כרגע בחופש ויש לי המון זמן לבזבז על עיצובי ציפורניים כיפיים.
הסיבה שהייתי איתו כל כך הרבה זמן היא שאני ממש אוהבת את הדוגמא הזו ופשוט לא רציתי להוריד אותה :)
אבל בגלל שבכל זאת רציתי לשחק קצת עם הלקים שלי כל עוד יש לי זמן פנוי, החלטתי לשדרג את העיצוב, ויצרתי 3 גרסאות שונות עם אותו הבסיס.

I have been wearing this manicure for 5 days in a row! That's a record time for me, especially now, when I am still on vacation and I love playing with my nail polishes as long as I have the time.
The reason I've been with this for so long is because I just love this design and I didn't want to take it off my nails :)
However, I didn't want to waste this opportunity, because I don't always have this much free time, so I decided to upgrade this manicure, and I have 3 different versions of it to show you.

1. בפעם הראשונה התחלתי עם 2 שכבות של China Glaze - Something Sweet. חיכיתי לייבוש מלא והחתמתי את דוגמת הורדים מדסקית 323 של Bundle Monster בעזרת לק שחור קרמי של וואו - מספר 393.
לאחר מכן מרחתי מייבש מבריק של פושה.

1. The first design is the basic one: I started with 2 coats of China Glaze - Something Sweet, and after it has dried completely, I stamped the roses from Bundle Monster 323, using a black cream polish from WOW Cosmetics - #393.


2. אחרי 3 ימים הרגשתי שהציפורניים שלי ארוכות מדי ושייפתי אותן. הוספתי גליטר הולוגרפי GK 734a ומעליו טופ מאט של שיק. 

2. After 3 days I felt like my nails are too long so I filed them, and added holographic glitter GK 734a and a matte topcoat by Chic.


3. אחר כך הרגשתי שעדיין חסר לי משהו, אז הוספתי פס של "פרנץ' מניקור" גלוסי עם Black Swift של Milani - שנותן כיסוי מלא בשכבה אחת ומתייבש מהר, ללא צורך במייבש.

3. Finally, I still felt like something was missing so I added a "french manicure" with Milani Black Swift - a glossy nail polish that dries fast and gives good coverage with one coat.


אני חושבת שהגירסא השלישית היא האהובה עליה, מה איתכם?
I think the third version is my favorite one, how about you?

Sunday, July 14, 2013

Feather Nail Art + Tutorial!


Today I had a little time off and I decided to use that time for some nail art. It's been a long time since I did something like this. I've been really busy with school work, so the most "complicated" nail art I did was stamping. I really missed it, it's just so much fun!

I've never tried this look before so I looked for some online tutorials, but as I was going along I realised I'm sort of changing the tutorial and making it more suitable for me, so I decided I'll share it with you guys! 

These are the products that I used to create this look:
  • Milani White On The Spot
  • Top Beauty black & white stripers
  • LAKA silver (#161)
  • GK #734A - holographic glitter topper
  • thin nail art brush
I started off with 2 coats of Milani White On The Spot
Then I drew a thin arched line across the nail using a black striper (1)
After that I drew very thin lines on both sides of the arch with the same striper, making sure I have very little polish on the brush (2).
I wanted to refine the lines so I took a white striper and drew a super thin line over the original first line, and I also added some random thin white lines on the sides of the feather (3).
I then drew a thin silver line over the White line (4) and added a little bit holographic glitter over the silver line - to add an extra spark.
Finally - I added a layer of Poshe fast drying top coat.

You don't have to follow all of the steps I did. A you can see in the photos - it looks good enough even after the first step. But if you do have some extra time, I really think the final result it worth the effort. This is one of the prettiest designs I'd ever done :)

***תרגום לעברית אחרי התמונות***


final look


 היום היה לי קצת זמן חופשי והחלטתי לחזור לעשות ניילארט. אחרי שלא היה לי זמן לזה במשך כל התקופה האחרונה. בגלל כל העומס של הלימודים, הדבר הכי "מסובך" שעשיתי לאחרונה היה חותמות, שזה סבבה והכל - אבל כבר התחיל טיפה לשעמם אותי.

אף פעם לא ניסיתי לצייר נוצה על הציפורן, אז חיפשתי מדריכים באינטרנט. תוך כדי העבודה שמתי לב שאני משנה מלא  דברים במדריך המקורי, אז החלטתי להראות לכם מה עשיתי.

אלה החומרים שהשתמשתי בהם:
  • לק לבן של מילאני
  • סטרייפרים של טופ ביוטי בצבעים שחור ולבן
  • לק כסוף של LAKA, מס' 161
  • גליטר הולוגרפי של GK, מס' 734A
  • מברשת דקה
התחלתי עם 2 שכבות של לק לבן (Milani White On The Spot)
השתמשתי בסטרייפר השחור וציירתי קשת אלכסונית באמצע הציפורן  (1).
עם אותו לק, ציירתי פסים דקים מאוד משני הצדדים של הקשת. וידאתי שיהיה ממש מעט לק על המברשת כדי שזה ייצא הכי דק שאפשר (2).
רציתי לרכך קצת את המראה אז בעזרת הסטרייפר הלבן הוספתי פס דק מאוד איפה שהייתה הקשת המקורית, והוספתי גם כמה פסים לבנים אקראיים בשאר החלקים של הנוצה (3).
עם מברשת דקה, ציירתי פס כסוף מעל הפס הלבן (4) והוספתי קצת גליטר הולוגרפי מעל הפס הכסוף.
סיימתי בשכבה של מייבש פושה

אתן ממש לא חייבות לעשות את כל השלבים שאני עשיתי כי זה לוקח המון זמן, ואפשר לראות בתמונות שכבר אחרי השלב הראשון מתקבלת תוצאה מאוד יפה, אבל אם יש לכן זמן וכוח - התוצאה הסופית ממש שווה את זה. אני חושבת שזה אחד העיצובים הכי יפים שיצא לי לעשות :) 

linkwithin

Related Posts Plugin for WordPress, Blogger...